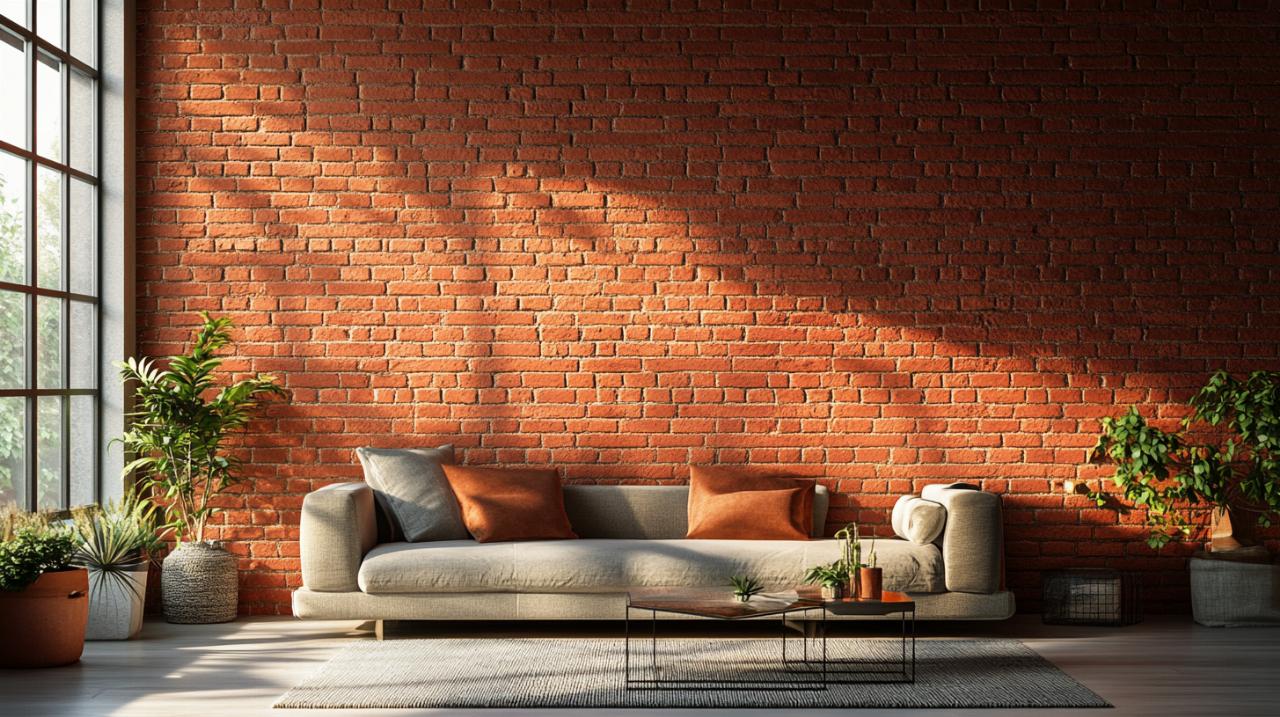
Transforming a red brick wall through paint offers one of the most satisfying ways to refresh a space, whether you're looking to brighten a room or create a focal point that captures attention. This approach provides an opportunity to revitalise tired surfaces without the need for extensive structural work, making it an accessible project for those keen to undertake a cost-effective renovation. With the right preparation, materials, and techniques, achieving a professional finish becomes entirely manageable, even for those new to home improvement tasks.
Preparing Your Brickwork: The Foundation of a Brilliant Finish
Assessing surface condition and necessary repairs
Before applying any paint, a thorough inspection of the brick surface is essential. Look for cracks, loose mortar, or areas where the brick may have deteriorated over time. Addressing these issues early prevents future problems and ensures that the paint adheres properly. If gaps or cracks are present, filling them with textured caulk creates a smooth surface and maintains the integrity of the wall. This step is particularly important when working with older brickwork, where wear and tear may have compromised the structure. Taking the time to repair these imperfections sets the stage for a transformation that will stand the test of time.
Cleaning techniques for optimal paint adhesion
Dust and grime accumulate on brick surfaces, especially in areas exposed to daily activity. A clean surface is critical for ensuring that primer and paint bond effectively. Begin by dusting the entire wall with a dry cloth or brush to remove loose particles. For more stubborn dirt, a damp sponge or cloth works well, though care should be taken not to saturate the brick. Pay particular attention to the grout lines, as these recessed areas often harbour debris that can interfere with coverage. Allow the surface to dry completely before moving on to the next stage, as moisture can prevent proper adhesion and lead to uneven results.
Choosing the Right Materials: What You'll Need for the Job
Selecting Appropriate Primers and Paints for Masonry
The choice of primer and paint significantly impacts the final appearance and durability of the project. Water-based paints are well-suited to masonry surfaces, offering flexibility and ease of application. A latex satin base coat provides a solid foundation, particularly when aiming to cover red brick, as it helps to neutralise the underlying colour. For the topcoat, gloss or semi-gloss enamel is recommended due to its resilience and ability to withstand cleaning. Avoid oil-based products on polyurethane surfaces, as compatibility issues can arise. When planning a whitewash effect, mixing white or cream latex paint with a clear mixing glaze extends drying time, allowing for adjustments and a more controlled finish. This method, which can be completed for less than twenty pounds, offers a budget-friendly project that delivers impressive results.
Essential tools and equipment checklist
Gathering the right tools before starting ensures a smooth workflow and reduces the likelihood of interruptions. Paint brushes in various sizes are indispensable, particularly for detailed work around grout lines and edges. Sponges provide versatility for creating texture or blending colours, while microfiber cloths are ideal for wiping away excess paint during whitewashing. A spray bottle filled with water can help dilute paint for a lighter application, and drop cloths protect surrounding surfaces from spills. Tape is useful for masking areas that should remain unpainted, and a toothbrush can assist in reaching tight spots or creating subtle effects. Investing in high-quality tools pays dividends in terms of both ease of use and the quality of the finished product.
Application techniques: achieving professional results
Priming methods for red brick coverage
Priming is a crucial step when painting red brick, as it ensures that the underlying colour does not bleed through and affect the final shade. Apply the primer evenly across the surface, using a brush or roller depending on the texture of the brick. For heavily textured surfaces, a brush may offer better penetration into crevices, while a roller speeds up coverage on flatter areas. Work in sections to maintain a wet edge, which prevents visible lines and ensures a uniform appearance. Allow the primer to dry thoroughly according to the manufacturer's instructions before proceeding to the topcoat. This patience is rewarded with a surface that is ready to accept the finishing layers without complications.
Layering and Finishing Touches for a Lasting Transformation
Once the primer has dried, the application of the topcoat brings the project to life. Traditional painting involves applying paint directly to the brick, ensuring even coverage and consistent colour. For those seeking a modern farmhouse look, a combination of techniques can create depth and character. Sponge painting introduces subtle variations in tone, mimicking the natural irregularities of brick. Whitewashing with diluted paint allows some of the original brick to show through, offering a softer, more rustic appearance. Strategic painting, where some bricks receive more coverage than others, adds visual interest and prevents the surface from looking overly uniform. Grout line painting, where the mortar is highlighted with a contrasting shade, enhances the textured effect and draws the eye. These layering techniques, when applied thoughtfully, result in a fireplace transformation or wall that serves as a living room focal point, elevating the overall interior design of the space. Step-by-step guide principles ensure that each phase builds on the previous one, culminating in a durable and visually striking finish that reflects both farmhouse style and personal creativity.